Kitchen Appliance Layout and Sizing Guide | C&S Remodeling
Discover how C&S Remodeling stands out among San Antonio’s top remodeling companies. Learn about their expertise, personalized service, and innovative designs that transform bathrooms and entire homes into beautiful, functional spaces. Ready to start your San Antonio bathroom remodeling journey? Contact C&S Remodeling today!
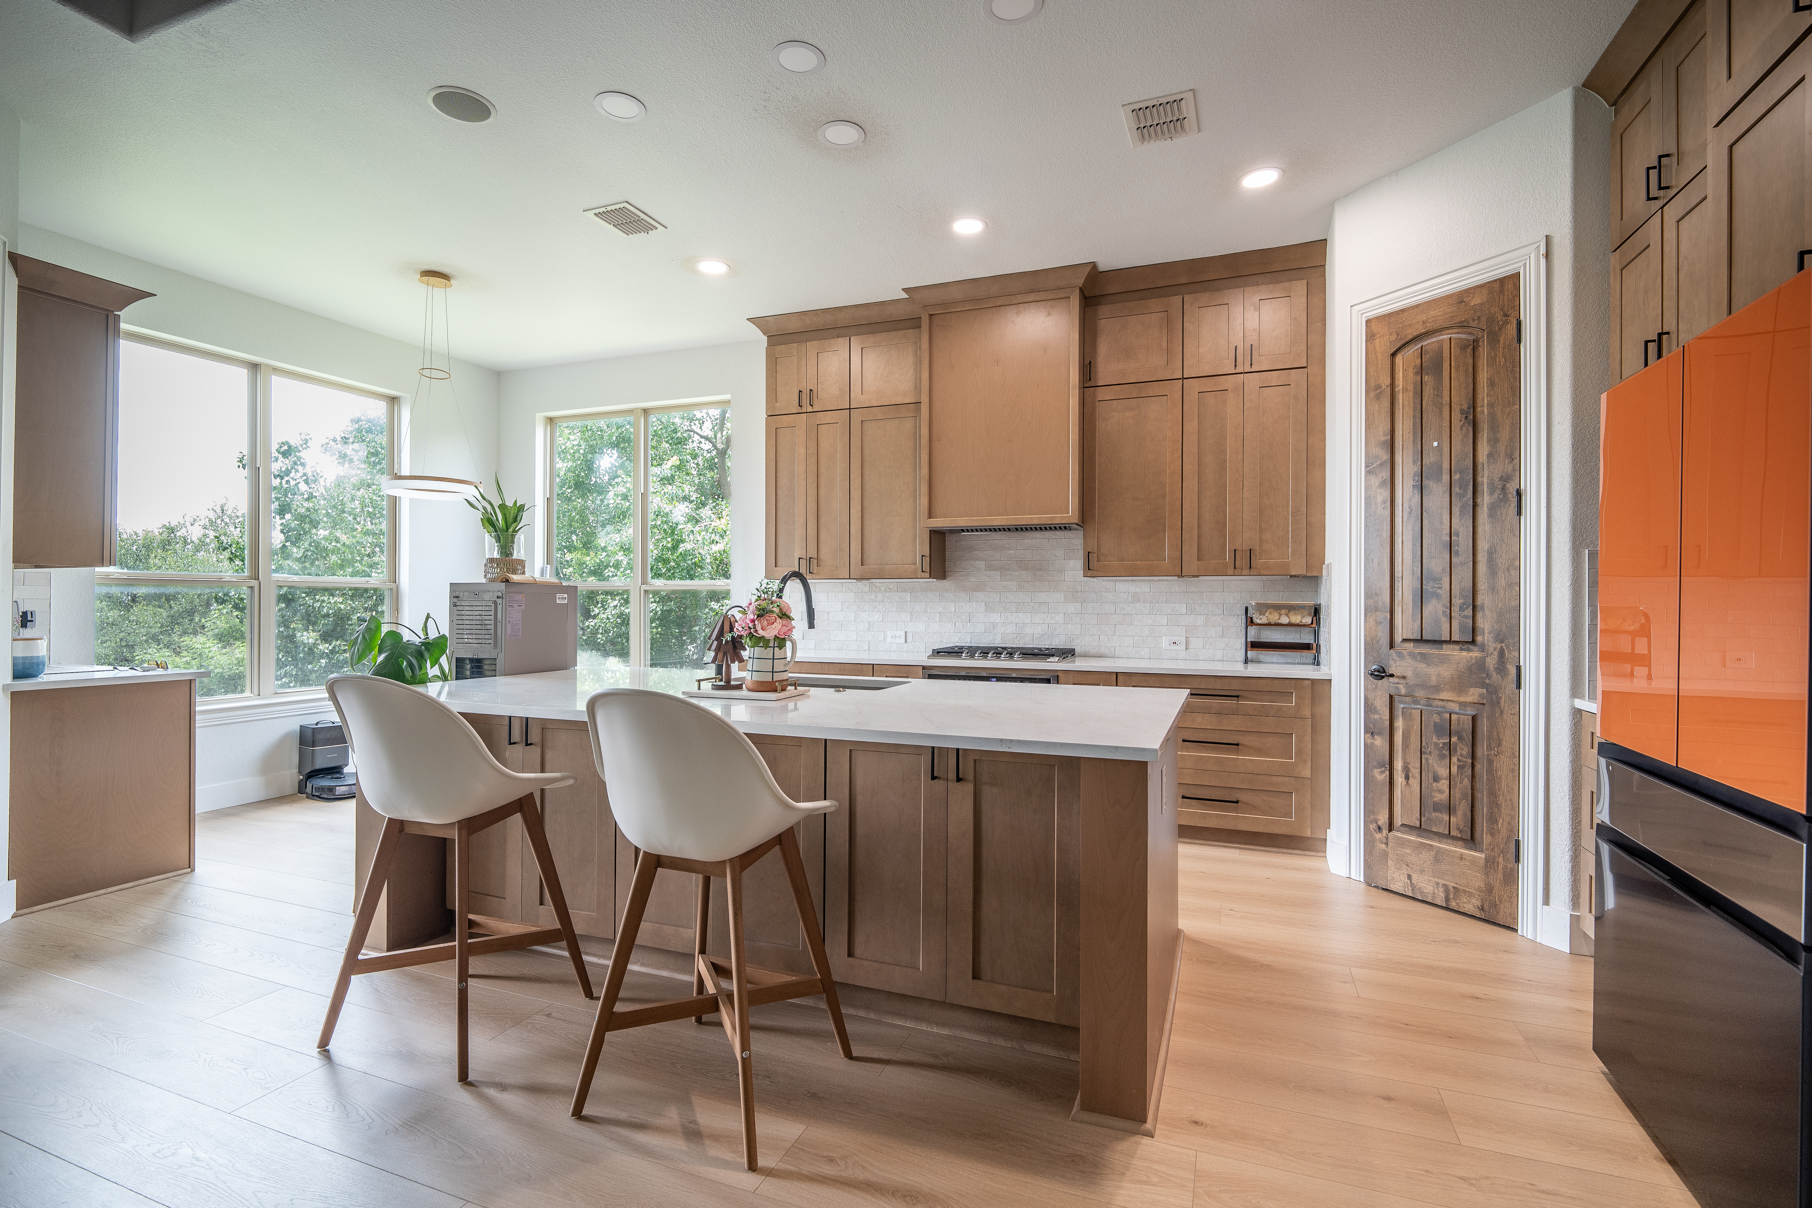
A homeowner falls for a 36-inch range after the cabinets are already ordered for a 30. It's a real mistake we've watched happen, and it costs a cabinet reorder and two to four weeks. Every cabinet run, countertop cutout, gas line, and outlet in a new kitchen is built around the exact width, depth, and height of the appliances you pick, which is why the right order for a kitchen remodel is appliances first, cabinets second. This kitchen appliance layout guide covers the standard sizes you'll be choosing between, how to arrange them so the room works, how much counter each one needs beside it, and how to size the ventilation.
Most of the kitchens we open up in San Antonio were built between the 1960s and the 1980s with a 30-inch range, a 33-inch refrigerator opening, and no real ventilation. Homeowners want something larger, quieter, or better vented, and that's exactly where layout planning pays off.
Standard Kitchen Appliance Sizes
Appliance widths are standardized, which helps, since cabinet openings are built to match them. Depth and height vary a lot more; those two numbers are what catch people off guard. Here are the standard kitchen appliance sizes we plan around.
ApplianceStandard widthsDepthHeightNotesFreestanding range30 in (most common), 36 in, 48 in25 to 29 in36 in at cooktop36 and 48 in pro-style ranges often need a 30 in or taller hood and a larger gas lineSlide-in range30 in, 36 in25 to 28 in36 inNo backguard; countertop runs behind it, so the counter template waits on the modelCooktop30 in, 36 in20 to 22 inDrop-inNeeds a base cabinet with a cutout and clear space below for a drawer or a wall ovenSingle wall oven24 in, 27 in, 30 in24 in28 to 30 inInstalled in a tall cabinet; 30 in is standard for most new kitchensDouble wall oven27 in, 30 in24 in50 to 53 inNeeds a full-height tall cabinet, roughly 84 to 96 inStandard-depth refrigerator30, 33, 36 in30 to 36 in66 to 70 inSticks 6 to 10 in past a 24 in base cabinetCounter-depth refrigerator30, 33, 36 in24 to 27 in (box)68 to 72 inSits nearly flush with cabinets; holds 20 to 25 percent less than the same width standard-depthBuilt-in refrigerator36, 42, 48 in24 in84 inFully flush, panel-ready options, the most expensive categoryDishwasher24 in (18 in compact)24 in34 to 35 inMust sit under a 36 in finished counter; check height if your floor is getting thicker tileOver-the-range microwave30 in15 to 17 in16 to 17 inBottom at least 66 in off the floor, or 13 to 16 in above the cooktopMicrowave drawer24 in, 30 in23 in15 to 16 inInstalls in a base cabinet or island; keeps the cooktop wall open for a real hoodRange hoodMatch or exceed range width18 to 24 inVaries30 in hood over a 30 in range, 36 over 36, 48 over 48
A few things worth underlining. A standard-depth refrigerator is the number one reason an otherwise tidy kitchen looks crowded. Counter-depth models cost more and hold less, but they keep the aisle open and the sightline clean, and that matters most in the galley and L-shaped kitchens you find all over Alamo Heights and Shavano Park. Dishwasher height is the second most common surprise. If you're going from sheet vinyl to thick porcelain tile, a 34-inch-tall dishwasher may not slide under a 36-inch counter unless somebody planned the floor or the toe kick for it.
Kitchen Work Triangle and Work Zones
The work triangle is the classic rule for kitchen appliance layout: the sink, the refrigerator, and the cooktop or range form a triangle, each leg between 4 and 9 feet long, with the three legs adding up to no more than 26 feet. Nothing, not an island and not a full-height pantry, should cut into a leg by more than about 12 inches. Hold to those numbers and you won't cross the room for every step of dinner.
The triangle was written for one cook in a closed kitchen. For an open-plan kitchen with two people working and kids cutting through for snacks, we plan in zones instead, then check that the zones still respect the triangle distances.
Storage zone. Refrigerator, pantry, and the tall cabinet for dry goods, grouped near the kitchen entry. Groceries come in and get put away without anyone crossing the cooking area.
Prep zone. The longest uninterrupted stretch of counter you've got, ideally between the sink and the cooktop, with knives, cutting boards, and mixing bowls in the drawers right below. Thirty-six inches is the minimum we aim for; 48 inches or more is comfortable.
Cooking zone. Range or cooktop, plus the wall oven if you have one. Pots, pans, oils, and spices within one step. The hood lives here too.
Cleanup zone. Sink, dishwasher, trash and recycling pullout, and the cabinet the dishes go back into. The dishwasher sits right beside the sink, within 36 inches, so you rinse and load without dripping across the floor.
Secondary zones. A coffee station, a beverage fridge on the living room side of an island, or a baking center with the stand mixer on a lift. Their whole job is keeping guests and kids out of the triangle.
In the San Antonio homes we remodel, the most common fix is pulling the refrigerator out of the middle of a counter run, where a builder parked it in 1978, and moving it to the end of the run next to the pantry. That one move often adds 3 to 4 feet of continuous prep counter without touching the footprint.
Landing Space and Clearance Rules
Landing space is the open counter right beside an appliance, the spot where you set something down. The guidelines below come from the National Kitchen and Bath Association (NKBA); they're what a kitchen designer is checking when they redline a plan.
LocationMinimum landing spaceWhyRefrigerator15 in on the handle side, or 15 in on either side of a French-door unit, or 15 in directly across from it (no more than 48 in away)Somewhere to set groceries and the roast you just pulled outRange or cooktop12 in on one side and 15 in on the otherHandles of pots, hot pans, and a trivet's worth of roomWall oven15 in beside it, or 15 in across from it within 48 inA hot sheet pan needs to go somewhere immediatelySink24 in on one side and 18 in on the otherDrying rack and a place to stage dirty dishesMicrowave15 in above, below, or beside the doorPulling out a hot bowl one-handed
Clearances are the other half.
- Work aisles: 42 inches minimum for one cook, 48 inches for two. That's the space between the island and the perimeter counters, measured counter edge to counter edge, not cabinet to cabinet.
- Walkways that are not work aisles: 36 inches.
- Dishwasher door swing: Leave 21 inches of standing room in front of the open door, and don't put it in a corner where that door blocks a drawer or another appliance.
- Refrigerator doors: A French-door fridge against a wall needs 2 to 4 inches of side clearance; otherwise the door won't open past 90 degrees and the crisper drawers won't pull out.
- Cooktop to wall: 12 inches minimum from the edge of a burner to a side wall or tall cabinet, and 30 inches from the cooktop surface to any combustible cabinet above it (24 inches if a hood or microwave is between them, per the manufacturer).
- Island seating: 24 inches of width per seat and a 15-inch knee overhang for counter-height seating.
If you remember nothing else from this section, remember these two: 42-inch aisles and 15 inches of counter beside the fridge. Those two rules save more kitchens from feeling cramped than any other decision.
Range Hood Ventilation: How Many CFM You Need
Most of the original kitchens we see in Bulverde, Helotes, and the older San Antonio neighborhoods have either a recirculating microwave hood or nothing at all. If you're spending on a new range, give the hood the same attention.
Cooking setupRecommended hood capacity30 in electric or induction range, wall-mounted hood300 to 400 CFM30 in gas range up to about 45,000 total BTU400 to 450 CFM36 in gas range, 60,000 to 75,000 BTU600 to 750 CFM48 in pro-style gas range, 90,000+ BTU900 to 1,200 CFMAny range on an island (island hood)Add roughly 50 percent to the wall-mount figure
The rules of thumb behind the table: for gas, divide total burner BTU by 100 to get a minimum CFM. For electric, figure 100 CFM per linear foot of range width. Island hoods need more because there's no wall behind the range to trap the rising air.
Three practical notes. First, vent outside whenever you can. A recirculating hood only filters grease; it does nothing about heat or humidity, and that matters in a Texas August. Second, any hood over 400 CFM triggers a makeup-air requirement in most jurisdictions, meaning a damper that lets fresh air in to replace what you exhaust. It's a manageable add, but it has to be in the plan before drywall. Third, the hood should be at least as wide as the range, and 3 to 6 inches wider on each side if you cook with a wok or sear a lot. Mount it 28 to 30 inches above an electric cooktop and 30 to 36 inches above gas.
Panel-Ready vs. Stainless and Other Finishes
Stainless steel is still the default and the safest resale choice. Fingerprint-resistant finishes have put the old smudge complaint to rest, and it goes with any cabinet color. Matte black and matte white are a close second in current kitchen appliance trends; both read well against white oak and painted cabinetry. Slate and bronze exist, but they narrow your cabinet and hardware choices.
Panel-ready appliances take a custom cabinet door on the front, so the refrigerator, dishwasher, and sometimes the freezer drawers disappear into the cabinetry. Because we build the cabinets ourselves, we can match a panel exactly, and in an open-concept kitchen that faces the living room the effect is worth it. The trade-offs are real, though. Panel-ready models run 20 to 40 percent more than the equivalent stainless unit, the panels themselves add cabinet cost, and a panel-ready refrigerator is almost always a built-in or counter-depth model, which puts you right back at the capacity question above.
The middle path a lot of our clients land on: a panel-ready dishwasher (a modest upcharge, and it sits at eye level in the cleanup zone) paired with a stainless or black counter-depth refrigerator and range that become the deliberate metal accents in the room.
On fuel: if your home has gas, a gas cooktop with an electric oven (a dual-fuel range) is what most serious cooks ask for. If your home is all-electric, induction has become the upgrade of choice. It boils faster than gas, keeps the kitchen cooler, and gets by with a smaller hood. It does need a dedicated 40- or 50-amp circuit and induction-compatible cookware, so tell your designer early.
Match Appliances to How You Cook
The sizing and layout rules are the same for everyone. The appliance list isn't. Here's how to choose kitchen appliances by household rather than by showroom.
If you bake often: A 30-inch double wall oven, or a single wall oven plus a range, lets you run two temperatures at once. Plan a 48-inch stretch of counter nearby for cooling racks, plus a cabinet with a mixer lift.
If you cook seriously: A 36-inch range with six burners or a 36-inch induction cooktop, a hood sized to match (see the table above), and the 15-inch landing space on both sides rather than the minimum 12. A pot-filler over the range is a cheap add while the plumbing's already open.
If you entertain: A second dishwasher or a dishwasher drawer near the island, a 24-inch beverage refrigerator on the living-room side of the island, and a microwave drawer so the cooktop wall stays clear. An ice maker earns its keep in a San Antonio summer.
If you have a full house: A 36-inch French-door refrigerator (standard depth if the aisle allows, because capacity matters more than the flush look), a dishwasher rated 44 decibels or lower so it can run during dinner, and a microwave at a height the kids can reach safely; that usually means a drawer or a shelf, not over the range.
When to Buy Appliances During a Kitchen Remodel
Choose your appliances before the cabinets are finalized. Not before the project starts, and not necessarily bought and paid for, but picked by model number so the designer can pull the manufacturer's installation spec sheet. Here's the sequence we follow.
StageWhat happens with appliancesDesign and 3D renderingPick category and size (30 vs. 36 in range, counter-depth vs. standard fridge, wall oven or not). The layout is drawn around these.Before cabinet orderConfirm exact model numbers. Cabinet openings, the hood chase, the gas line size, dedicated circuits, and the countertop template all come from the spec sheets. This is the point of no return for cabinet dimensions.During demo and rough-inPlumbing and electrical are placed to the spec sheets: the 40- or 50-amp induction circuit, the pot filler, the dishwasher supply, the hood duct.1 to 2 weeks before cabinet installAppliances are purchased and delivered, or confirmed in stock for delivery. Lead times on built-in refrigerators and pro ranges can run 8 to 16 weeks, so order those earlier.After countertopsSlide-in ranges, cooktops, and dishwashers go in once the counters are templated and set. Refrigerators and wall ovens can go in with the cabinets.
The mistake that costs the most is buying a refrigerator on sale in month one and finding out in month three that it's 2 inches deeper than the opening. The second most expensive is the one this post opened with: a 36-inch range chosen after the cabinets were built for 30. Both go away if the model numbers are locked before the cabinet order.
One more reason to decide early: the 3D renderings we produce for every project use the actual appliance dimensions, so you'll see a counter-depth refrigerator beside a standard one, or a 36-inch hood over the range, before anything gets ordered.
Why a Design-Build Firm Handles This Better
Everything above touches three trades: the designer who draws the layout, the cabinet shop that builds the openings, and the plumber and electrician who run the lines. When those are three separate companies, the spec sheet gets lost somewhere between them, and the gap shows up on install day.
Scott and Carol Kressner started C&S Remodeling in 2015; it's veteran-owned, woman-owned, and design-build, so design, cabinetry, construction, plumbing, and electrical all live in-house. The same team that drew your kitchen appliance layout builds the cabinet openings and runs the 50-amp circuit, so the dimensions on the rendering are the dimensions on the wall. We coordinate appliance delivery with the cabinet and countertop schedule, and we back the work we install with a one-year full warranty after completion plus a five-year limited warranty.